Home Made Yogurt
We only ever had home made yogurt at home growing up and the texture and flavor is probably far superior to the ones that you get in the grocery store. I always thought it was a mystery how a little bit of yogurt turned a bunch of warm milk into a giant pot of yogurt. I realize now though that it’s just a bit of simple science and it’s really quite simple. Yogurt is good bacteria and, given the right temperature and conditions, the bacteria grows and ta-da…giant pot of yogurt made for a fraction of the cost of the containers you can buy.
Home Made Yogurt
Ingredients:
8 cups milk (whole milk is best)
1/2 cup yogurt containing active cultures (check the ingredients)
8 cups milk (whole milk is best)
1/2 cup yogurt containing active cultures (check the ingredients)
Method:
- Heat the milk. Pour the milk into a Dutch oven or heavy bottomed pan and set over medium to medium-high heat. and warm the milk until it’s just about to boil. ( about 200°F).
Note: Stir the milk gently as it heats to make sure the bottom doesn’t scorch and the milk doesn’t boil over.
- Cool the milk. Let the milk cool until it is just warm to the touch, 112°F to 115°F. Stir occasionally to prevent a skin from forming.
- Thin the yogurt with milk. Scoop out about a cup of warm milk with a measuring cup and add the yogurt. Whisk until smooth and the yogurt is dissolved in the milk.
- Whisk the thinned yogurt into the milk. Pour the thinned yogurt into the warm milk while whisking gently. This inoculates the milk with the yogurt culture.
- Transfer the pot to a (turned-off) oven. Cover the Dutch oven with the lid and place the whole pot in a turned-off oven — turn on the oven light or wrap the pot in towels to keep the milk warm as it sets (ideally around 110°F, though some variance is fine). You can also make the yogurt in a dehydrator left at 110°F or using a yogurt maker.
- Wait for the yogurt to set. Let the yogurt set for at least 4 hours or as long as overnight — the exact time will depend on the cultures used, the temperature of the yogurt, and your yogurt preferences. The longer yogurt sits, the thicker and more tart it becomes. If this is your first time making yogurt, start checking it after 4 hours and stop when it reaches a flavor and consistency you like. Avoid jostling or stirring the yogurt until it has fully set.
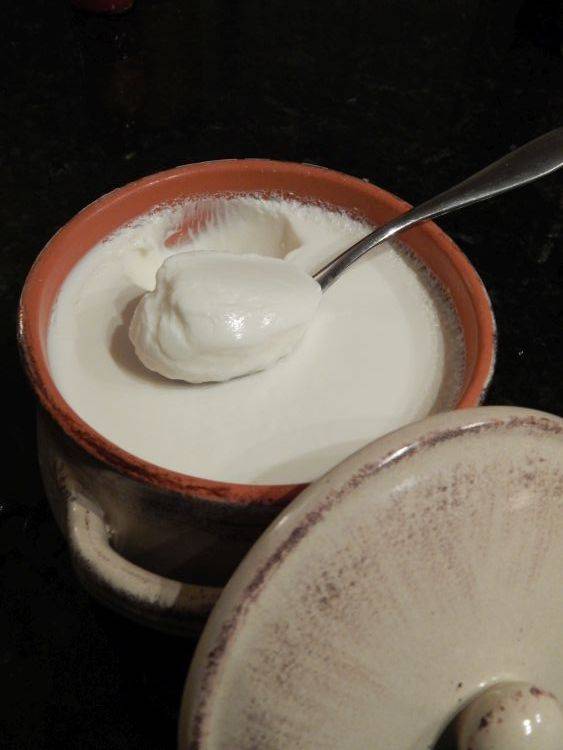
- Cool the yogurt. Once the yogurt has set to your liking, remove it from the oven. If you see any watery whey on the surface of the yogurt, you can either drain this off or whisk it back into the yogurt before transferring to containers. Whisking also gives the yogurt a more consistent creamy texture. Transfer the to storage containers, cover, and refrigerate. Homemade yogurt will keep for about 2 weeks in the refrigerator.
- Your next batch of homemade yogurt. Once you start making your own yogurt, you can use some of each batch to culture your next batch. Just save 1/2 cup to use for this purpose. If after a few batches, you notice some odd flavors in your yogurt or that it’s not culturing quite as quickly, that means that either some outside bacteria has taken up residence in your yogurt or that this strain is becoming weak. As long as this batch still tastes good to you, it will be safe to eat, but go back to using some store-bought commercial yogurt in your next batch.
Recipe From the kitchn